> For the complete documentation index, see [llms.txt](https://docs.chartprime.com/llms.txt). Markdown versions of documentation pages are available by appending `.md` to page URLs; this page is available as [Markdown](https://docs.chartprime.com/market-dynamics/order-blocks.md).
# Order Blocks
### What Order Blocks show
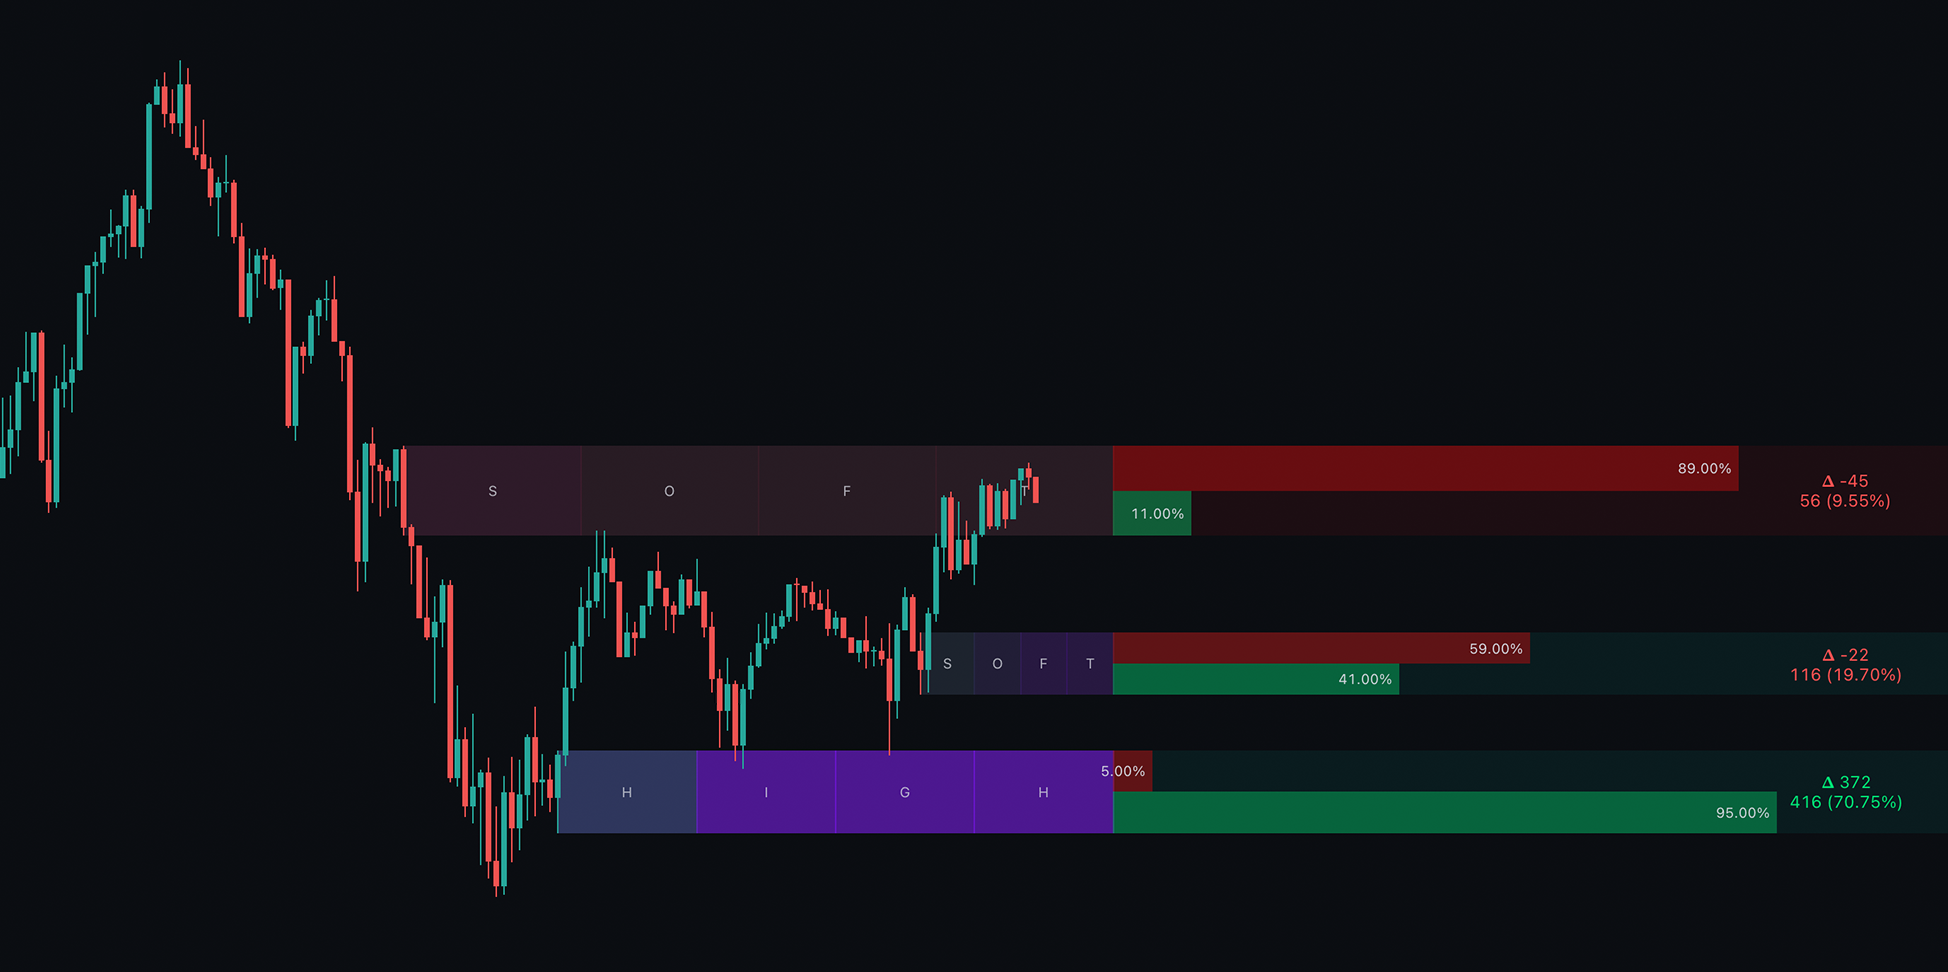
Order Blocks highlight price zones where volume clusters. They help you spot likely support/resistance and decision points. They also work well as TP/SL reference areas.
Order Blocks on chart
### Strength levels (Soft / High / Loud)
Order Blocks are grouped into three strength levels. Higher strength blocks are usually more meaningful.
{% columns %}
{% column %}
#### Soft
Lowest strength. More frequent. Best used as minor, “in-the-noise” levels.
{% endcolumn %}
{% column %}
#### High
Mid strength. Good default for most setups. Often respected during normal market conditions.
{% endcolumn %}
{% column %}
#### Loud
Highest strength. Less frequent. Best used for bias and key levels.
{% endcolumn %}
{% endcolumns %}
{% hint style="info" %}
If the chart feels cluttered, start with **High** + **Loud** only.
{% endhint %}
### How to read an Order Block
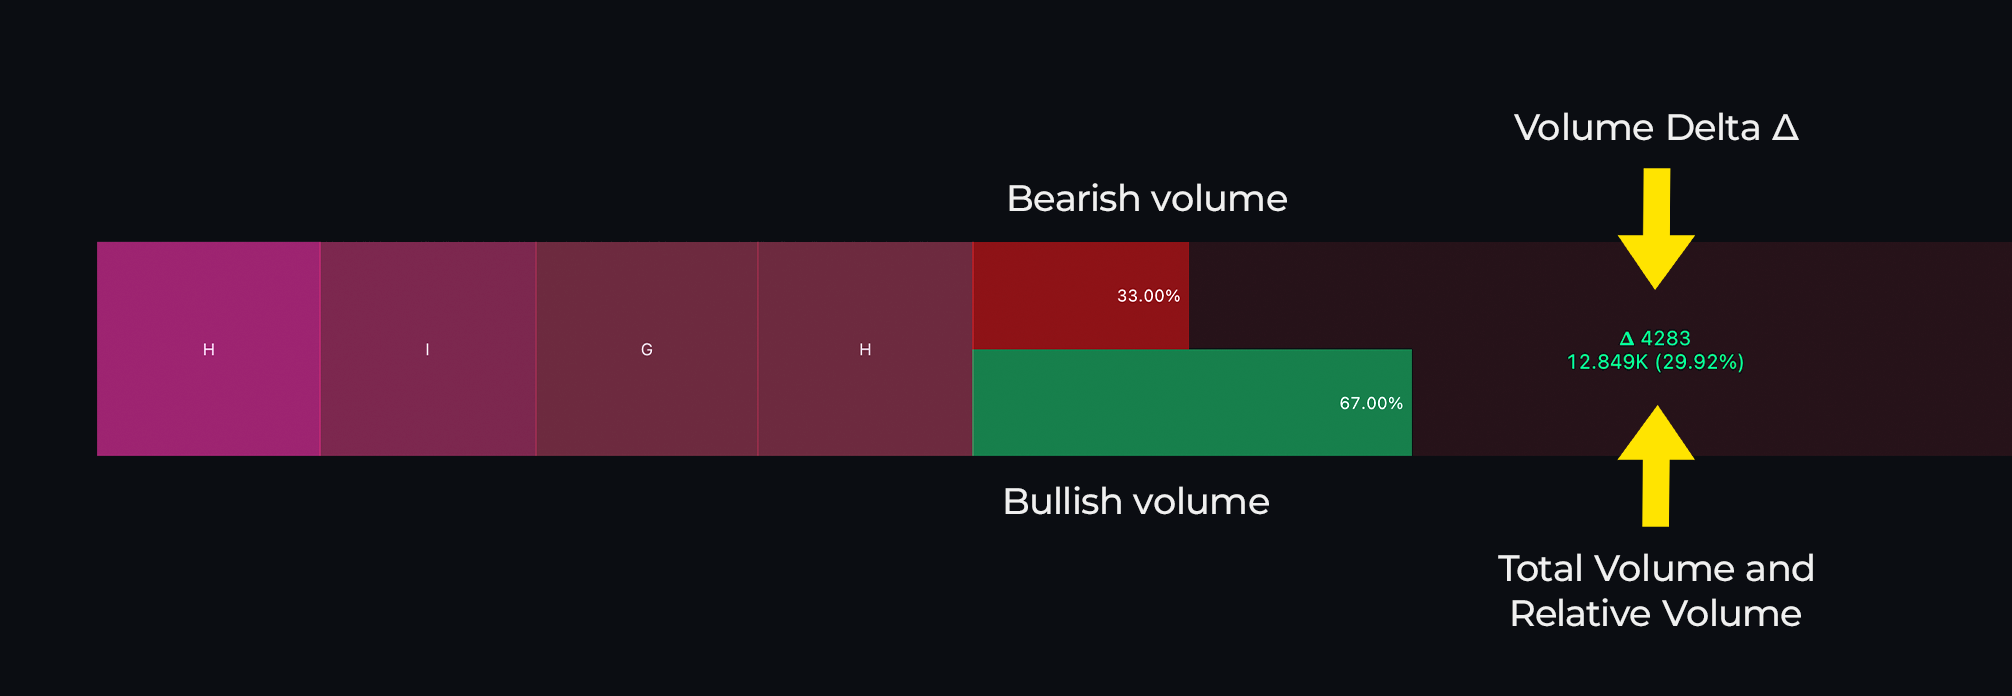
Each block can show two metrics. They answer different questions.
#### Relative % of Volume
This is a **normalized** share of volume across the blocks shown. The values add up to **100%**. Higher % means the block stands out versus others.
#### Data + Volume
This is the **raw** volume value contributing to that block.
Block metrics, bullish vs bearish split, and volume delta
The green/red bar shows the bullish vs bearish volume split. The **Δ (delta)** is the difference between bullish and bearish volume.
{% hint style="info" %}
Since Pine Script can’t access order book data, Order Blocks are inferred from **volume analysis**.
{% endhint %}
### Quick workflow
{% stepper %}
{% step %}
### Pick a clean starting view
Set **Max OBs** (defaults to **4**) to control how many blocks are visible. Fewer blocks means less noise.
{% endstep %}
{% step %}
### Choose the generation style (Dynamics)
Use **Original** for more “natural,” lightly filtered blocks. Use **Attuned** for cleaner spacing and more uniform blocks.
{% endstep %}
{% step %}
### Use multi-timeframe blocks when you want stronger levels
Enable **MTF Timeframe** and pick a higher timeframe. A good rule is **4× your current chart timeframe** (1H chart → 4H+ blocks).
{% endstep %}
{% step %}
### Filter for the blocks you actually want to trade
Use **Sensitivity** to filter by:
* Strength (Soft / High / Loud)
* Direction (bullish / bearish)
{% endstep %}
{% endstepper %}
### Video walkthrough
{% embed url="" %}
### Settings reference
{% tabs %}
{% tab title="Display" %}
#### Max OBs / Show last
Controls how many Order Blocks you see at once. Default is **4**.
Higher values can surface weaker blocks. Lower values keep only the most relevant ones.
{% endtab %}
{% tab title="Dynamics" %}
#### Original vs Attuned
* **Original**: less filtering, more organic blocks.
* **Attuned**: cleaner output, more regular sizing and spacing.
{% endtab %}
{% tab title="Sensitivity" %}
#### Strength and direction filters
Use this to show only what matches your plan:
* Strength: Soft / High / Loud
* Side: bullish / bearish
{% endtab %}
{% tab title="MTF Timeframe" %}
#### Multi-timeframe Order Blocks
Displays blocks derived from another timeframe. Higher timeframes usually produce stronger, more “macro” zones.
{% endtab %}
{% tab title="Block metrics" %}
#### What shows inside the block
Use the toggles to show/hide the metrics inside the block. This is where you enable **Relative %**, **Volume**, the split bar, and **Δ**.
{% endtab %}
{% endtabs %}
{% hint style="info" %}
To display Order Blocks, the asset must have **volume data**.
{% endhint %}